Friday, November 4, 2011

Salted Oatmeal White Chocolate Cookies

It’s been almost 8 months since my last post, where has all the time gone? Probably to finishing my 3rd year (and entering my fourth year) of school at Humber College, and my adventurous summer which included a new job and a 3-week journey in Europe. Countless memories have been made, and I cherish every single one. Getting back to baking at home has been wonderful to say the least, I’m remembering why I miss it so much. It's the way it takes me someplace else and away from the day to day stresses, and of course having something delicious to eat at the end of it all.

Although fall is coming to a close, I am still in full “pumpkin obsessed” bliss, trying to think of as many ways to incorporate the lovely ingredient into everything and anything. So far my top three are Whoopie Pies (to be baked ASAP), Pumpkin Pancakes, and a Pumpkin Chocolate, Walnut, Cranberry Loaf (see below). Amidst my pumpkin obsession, I found a recipe for Salted Oatmeal White Chocolate cookies (they sound delicious right? And believe me, they were). Come on, anything that is salted HAS to be good, seeing as salt just brings out the flavours of anything you put it on, well almost anything. I was trying to think of something to bake for my girlfriend for her birthday, and these cookies instantly stood out to me. I’ve always had a love for white chocolate macadamia cookies, so any cookies with white chocolate in it is good in my books.
They came together rather simply- cream the butter and sugars, mix the dry ingredients, add eggs to wet- and then the dry ingredients. After scooping out relatively uniform sized pieces of dough, the final touches were added- the salt. I knew as I sprinkled a couple of flecks of Maldon salt on top of each piece of dough, that these were going to be fantastic. After 20 minutes in the oven, the kitchen was filled with the nostalgic smell of home-baked cookies (which instantly bring me back to making Christmas cookies with my mom- which I am TOTALLY looking forward to this year). Unfortunately, I hadn’t left enough room between each ball of dough, as the cookies came out kind of square. Their lack of circular figure was made up for in flavour, and I had to limit myself to just one- I couldn’t show up to my girlfriends house with A cookie. They were perfect- crispy on the outside, and forgivingly chewy on the inside. I will definitely be making these again. To top it all off, they made a wonderful birthday present, as my girlfriend and her family loved them. There is nothing better then experiencing the moment when someone tries what you’ve baked, and a smile comes across their face. This is why I love to bake, because I get the chance to make people happy, all while satisfying their tastebuds.
Below is the recipe as borrowed from Smitten Kitchen-

I made a few changes here and there, but used the recipe as a base.

Crispy Salted Oatmeal White Chocolate Cookies
Adapted from Cook’s Illustrated

1 cup all-purpose flour
3/4 teaspoon baking powder
1/2 teaspoon baking soda
1/4 teaspoon table salt
14 tablespoons (1 3/4 sticks) unsalted butter, slightly softened
1 cup sugar
1/4 cup packed light brown sugar
1 large egg
1 teaspoon vanilla extract
2 1/2 cups old-fashioned rolled oats

6 ounces good-quality white chocolate bar, chopped (not “white chocolate” chips; they’re almost always artificial. I am adamant about this.)

1/2 teapoon flaky sea salt (like Maldon or fleur de sel) (for sprinkling on top)

1. Preheat oven to 350 degrees. Line baking sheet with parchment paper or Silpat. Whisk flour, baking powder, baking soda, and table salt in a medium bowl.

2. Beat butter and sugars until light and fluffy. Scrape down bowl with rubber spatula, then add egg and vanilla and beat until incorporated. Scrape down bowl again. Add flour mixture gradually and mix until just incorporated and smooth. Gradually add oats and white chocolate and mix until well incorporated.

3. Divide dough into 24 equal portions, each about 2 tablespoons. Roll between palms into balls, then place on lined baking sheets about 2 1/2 inches apart. Using fingertips, gently press down each ball to about 3/4-inch thickness.

4. Sprinkle a flake or two of sea salt on each cookie

5. Bake until cookies are deep golden brown, about 13 to 16 minutes, rotating baking sheet halfway through. Transfer baking sheet to wire rack to cool.

Wednesday, March 2, 2011

Lemon Tarts

Lemons, Lemons Lemons. I absolutely adore the citrus-y freshness and tart flavours of this wonderful fruit. Food would be so boring without it, baking would be lost without it, and life...yes, even life, would be sub-par without lemons. With lemons + the wonders of baking, you can do a hell of a lot more than just dance (I'm not much a dancer anyways). I'm not quite sure when my love for this magical fruit began, but as each day passes I love it a little more. In my eyes, nothing beats a perfectly cooked Lemon Meringue Pie, Lemon Bar, or Lemon Tart. If I lived in Florida or California, I would TOTALLY have a Lemon Tree, or a dozen, growing in my backyard. But unfortunately for me, Canadian winter's have robbed me of this human right (thank-god for free-trade and the abundance of grocery stores in my near vicinity). I cannot imagine being robbed of this perfect morsel of goodness.

Anyways, as of a few days ago, my fridge suddenly became full of lemons, and I had no excuse but to bake myself (and whoever happens to see me within the next few days) something lemon oriented. I had some leftover pie dough in my fridge from some recipe testing a few weeks ago that involved maple syrup, pecans, and bacon. So naturally, the idea was right there in front of me- Lemon Tarts. Individual sized, so that you could justify having a few- which would totally equate to one slice of pie, or something. This recipe is so simple to make; all it takes is sugar, lemon juice, lemon zest, flour, and eggs then ta-da! you have dessert! So tonight, a random Wednesday night, I realized I was finally (somewhat) free of homework, and had some time to myself to bake. No distractions, just the ingredients and me. Unfortunately my classes today didn't end till the afternoon, and by the time I was home and ready to bake, the sun (and all of its wonderful natural light) had set- so my pictures might be sub-standard and lacking oomph (I'm sorry).

It didn't take me long to whip up the lemon filling (which I graciously borrowed from smitten kitchen's recipe originally intended for lemon bars). I rolled out my leftover pie dough, cut out some circles, filled the muffin tins and proceeded to fill the dough with luscious lemon filling. In 30 minutes I would be greeted with the lovely and subtle aroma of lemon tarts. Such a simple recipe, but totally not simple in taste.
I took them out of the oven and hastily transferred them to a plate. I couldn't wait to let them cool (and to sprinkle icing sugar on them) so I just had one plain. I was instantly met with a light and fluffy filling (not so much the lemon curd texture I was expecting) but never the less, the tartness sparked through my taste buds which resulted in a smile across my face. The pie dough was flaky and buttery, a perfect compliment to the sweet sweet filling. My lemon craving was more than satisfied by this simple and delicious tart (and unfortunately my self-control is telling me not to go back for seconds) but tomorrow is another day! I'm not quite sure what it is, but lemons remind me of the summer, more specifically, of sitting on a beach basking in sunshine. That's where I wish I could be right now, and these lemon tarts are kind of a glimpse into that paradise for me. Citrus-laced desserts and sunshine...can't think of a better pairing (well...maybe maple and bacon, but we'll save that for another day).

Till next time!

Addison

Tuesday, February 8, 2011

Carrot Cake Cupcakes with Maple-Cream Cheese Frosting

I love cupcakes. They are the perfect combination of icing and cake, one on top of the other. Even more, the combination of flavours are endless. Strawberry icing on chocolate cake, vanilla icing on vanilla cake, raspberry icing on vanilla cake, maple bacon icing on...maple cake? I'm still itching to try that last combination, as the combination of maple and bacon is my all time favourite. When I came across this recipe for carrot cake cupcakes with maple cream cheese frosting I knew I had to make them. I was about to embark on my first attempt to make cupcakes. I can't believe I've never made them before, honest. But now with my newly acquired piping bag, and gradually improving piping skills- I'm ready to ice these cupcake creations.


I'd have to say that carrot cake is up there as one of my favourite cakes. I'm not much of a chocolate cake fan, I do like vanilla cake with vanilla buttercream, and I absolutely love coconut cake- specifically the toasted coconut layer cake that I made for Jacquelyn last-last Christmas (it was like a giant bombshell of coco-nutty perfection). Along with coconut, is my love for carrot cake. Plus it's totally healthy for you, it has carrots in it! (it's how I convince myself to indulge). That mix of carrot, cinnamon, and sweet/tart cream cheese frosting is magical. It's a dessert that doesn't totally feel like you're eating dessert- more like a sweet breakfast treat. I acquired this recipe from Deb at smittenkitchen.com, I swear she has never made a bad recipe. The recipe called for 24 cupcakes, but I halved it because I can sort-of manage consuming half that amount in a week or so...with sharing of course!

Today I woke up to a bright, sunny day, which brought a smile to my face- winter has been taking it's toll. There's just too many grey-gloomy days, with a serious lack in sunshine. Even though it's frost-bite cold outside, I bared the bite and spent some time outside. I went out for lunch with one of my best friends, Bernarda. Lots of catching up, good food at Jack Astors, and really tasty drinks (blue raspberry Lemonade and Cool Breeze) yes they were cocktails- but those are what taste the best.

After arriving home I got down to business. After peeling and grating the carrots, measuring flour, sugar, butter, eggs etc. I was ready to create my very first home-made cupcakes. They came together relatively quickly, and getting the batter into the pan was a cinch ( due to the nifty trick I learned at my Baking Arts course from Chef Rock- using an ice cream scoop for even filling every time, genius I know). The sunshine pouring through the kitchen windows made baking today just that much more enjoyable, I just wish it were summer...and that Toronto had a beach resembling the best of the best i.e. Florida, California, I could go on forever. Anyways, the cupcakes took almost twice as long to bake as the recommended time, I found this quite odd for smitten kitchen has never let me down before, maybe there was a typo in the recipe. Regardless, after letting them cool, and practicing my piping skills, I managed to have 4 cupcakes I would be proud to photograph, and the rest...well they can be eaten off camera. All in all my first cupcake baking experience was great, and it will ensure many more to come- Maple Bacon cupcakes here I come.
Till next time!

Addison


Below is the recipe as borrowed from Smitten Kitchen-

I halved the recipe and tweaked it slightly.

Carrot Cake Cupcakes with Maple Cream Cheese Frosting

Makes 12 cupcakes

1 cup of all purpose flour
1 teaspoons baking soda
1/2 teaspoon salt
1 teaspoons ground cinnamon
1/4 teaspoon ground nutmeg
1/2 teaspoon ground ginger
1 cup of sugar
3/4 cups canola oil
2 large eggs
1 1/2 cups grated peeled carrots

Preheat oven to 350°F.

Line 12 cupcake molds with papers.

Whisk flour, baking soda, salt, cinnamon, nutmeg and ginger in medium bowl to blend. Whisk sugar and oil in large bowl until well blended. Whisk in eggs 1 at a time. Add flour mixture and stir until blended. Stir in carrots, walnuts and raisins, if using them. Divide batter among cupcake molds, filling 3/4 of each.

Bake cupcakes 14 to 18 minutes, or until a tester inserted into the center of one comes out clean. Let cool in pans for five minutes or so, then transfer cakes to a cooling rack. Let cool completely before icing them.

Maple Cream Cheese Frosting

One (8-ounce) package of cream cheese, softened
1/2 a stick unsalted butter, room temperature
1 cup of confectioners’ sugar
1/4 cup pure maple syrup

In a stand mixer beat all the ingredients on medium until fluffy. Chill the frosting for 10 to 20 minutes, until it has set up enough to pipe smoothly.


Tuesday, February 1, 2011

Date Squares

The only reason I can tolerate a Canadian winter- full of unnecessary bone-chilling winds and snow, is because it's the number one reason to spoil myself with comfort food. Comfort food is such a subjective subject, and can be defined as a kind of food that makes you feel warm, cozy, and at home. It fills you up and reminds you of good times and brings you back down to earth. Whichever food can do this for you is up to you, which is what makes "comfort food" so versatile. For me, the favourites are pancakes with maple syrup and bacon, a deliciously juicy hamburger, my Dad's beef and barley stew, and a classic grilled cheese sandwich (just to name a few, because trust me, there are so many more). If there is such a thing as a comfort food dessert, than for me it has to be cinnamon buns, and every once in a while- I crave Date Squares.
It may seem random, I know, but for some reason that time-tested combination of brown sugar and butter, paired with the sweetness of pureed dates, is smile-inducing. Dates may not be the prettiest looking fruits out there, but when boiled with the addition of lemon zest, then pureed in a food processor, the resulting paste is to die for. To top it off, when this paste is sandwiched between a "brown sugar and butter" oat crumble, it is true perfection.
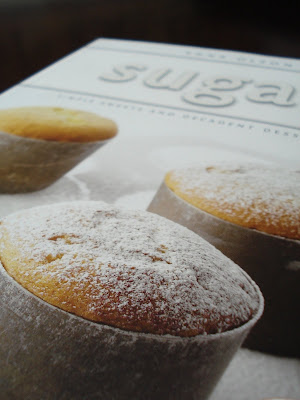
I've tried to make a point to delve into my cookbooks every once and a while for a recipe, because lately I've come accustomed to the easy way out- finding a recipe online. There is no shortage of delicious and craving-inducing recipes online, but sometimes nothing beats a hard-copy paper recipe, especially when it's from Pastry Chef/TV Personality/Baking Genius Anna Olson.
I own both of her baking centric cookbooks- Sugar & Another Cup of Sugar. Her simple yet elegant recipes, easily adaptable to add your own personal touch, fill these books. I've bookmarked more than a few recipes that I plan on trying when time permits, and today time was on my side. I struggled between making lemon squares or date squares, but as I looked outside to a gloomy, and certainly cold looking, winter day, I knew it had to be date squares. Thankfully my Mom had recently brought me a gift bag of ingredients full of chocolate, pecans, corn syrup (for the pecan tarts that I made for my girlfriend Jacquelyn), and dates!

If there's one thing that I love about baking, it's those few last minutes of baking time, when your whole kitchen is filled with the aroma of whatever is within your oven. When I finally opened the oven door (after waiting a grueling 40 minutes- well, it wasn't so grueling, I was catching up on Top Chef Season 2 online) I was greeted with a wave of sweet datey-goodness. Cutting out a piece for myself, I bit into it and felt purely content. The sweet crumble topping and smooth date puree tasted magnificent, it tasted exactly like a date square should. I didn't want something new, or a different kind of texture, I just wanted a date square and that's exactly what I got. Furthermore, the crumble to date filling ratio was perfect, not too much of one or too little of the other. What these date squares lack in aesthetics they make up for in flavour, trust me when I say they are delicious! I substituted lemon zest in place of the orange zest the recipe called for (partly because I didn't have oranges) but that's besides the point. The lemon added a nice zing of citrus to accompany the sweetness of the date puree.

I'd say this was another successful baking day for me, and as I sit here writing this, I feel sleepy and completely in the mood to lie down and watch the Food Network. But today isTtuesday, and that means that tonight is my Baking Arts Course, so my wish shall have to wait. Tonight we are learning how to pipe, which may seem amateur to some, but I'm sure there is an art to it. I'm excited, because then I can attempt some really awesome cupcakes that I've been wanting to bake, and not only make them taste good, but look good as well. Anyways, I have an 8 X 8 inch square baking pan of date squares to myself, which probably isn't a good thing. Anybody want some?
Till next time!

Addison


Date Squares Recipe-
inspired by/courtesy of Anna Olson's cookbook- Sugar


Yield: 16- use a 8 x 8 square baking pan

Ingredients

Date Filling

  • 3 cups pitted dates
  • 1 1/2 tablespoons lemon zest
  • 1 1/2 tablespoons unsalted butter
  • 1 cup water

Crumble

  • 2 1/2 cups rolled oats (regular or quick cook)
  • 1 1/4 cups all purpose flour
  • 1 cup golden brown sugar, packed
  • 2 teaspoons cinnamon
  • 1/2 teaspoon salt
  • 1 cup unsalted butter, melted

Directions

  1. For filling, place all ingredients in a pot and bring up to a boil. Remove from heat and let dates sit and soak until room temperature. Purée until smooth and set aside.
  2. Preheat oven to 350° F, grease and 8-inch square pan and line bottom with parchment paper so that the paper hangs over the edge of the pan on 2 sides. Combine oats, flour, brown sugar, cinnamon and salt in a bowl. Stir in butter and blend until an even crumbly texture. Press half of the crumble into the bottom of prepared pan. Spread date filling over base and top with remaining crumble (not pressing). Bake for 40 to 45 minutes, until the top of crumble begins to brown. Allow to cool before cutting into squares.

Tuesday, January 25, 2011

Peanut Butter-Stuffed Semi-Sweet Chocolate Sandwich Cookies

There's something about the infamous combination of chocolate and peanut butter that pushes all self control out the window for me. The smooth, nutty textures and sweet flavour of peanut butter, mixed with a perfectly balanced combination of sweet and bitter chocolatey goodness, is like heaven.
I woke up today with the intention to bake, I didn't know what, but I was determined to find out. I keep a box of recipes in my bedroom- loose sheets from every imaginable food magazine, and print-offs from the many food blogs I follow. I came upon the recipe for Peanut Butter-Stuffed Milk Chocolate Sandwich Cookies from an Every Day Rachael Ray Magazine and was set. I've been intending to make these for months, but never got around to it. Today was the day I'd step into the world of PB + Chocolate. I have a profound love for peanut butter, but not so much for chocolate. BUT- when you put them together, I am sold. I love Reeses Peanut Butter Cups, and Reeses Pieces, and Nutella and Peanut Butter Sandwiches (they're actually delicious, trust me- they were a cornerstone of my high school lunches). So this recipe was
a natural decision for me. Plus, this dessert is like 2 in 1- you get TWO COOKIES & Peanut Butter smooshed into the middle of these two cookies, can it get any better than that?

Not to say this was labour intensive, but I did go through 3 mixing bowls, tons of chocolate, and lots of tasting (purely for the recipes insured success and upmost detail to cleaning the spatulas). I swapped the Milk Chocolate that the recipe called for, for Semi Sweet (totally not because that's the only chocolate I had...). As I put the chocolate dough spheres into the oven I was a little hesitant that the dough was packed too tightly to spread out wide enough. Sure enough, after the 15 minutes in the oven, I took them out and saw that the cookies hadn't spread out to my desired...spreadness?
Nothing the bottom of a drinking glass won't fix. First I touched a cookie to see how hard it was and woah, I was so wrong. The cookies were SUPER soft and gave way with a sort of crackling noise as little air bubbles within the dough were popped. This was the. softest. cookie. I had ever made- which means chewy goodness, which I got so excited for. So with a little press of the glass on the top of each cookie, they became just the right size.
They kind of remind me of a Whoopie (not as smooth and elegant) but the concept is there- chewy/soft cookie with a light and fluffy something in the middle. Assembling these was a joy because I could see the light at the end of the tunnel....where one would meet with my eagerly awaiting taste-buds. As I bit into a sandwich (which was still slightly warm from the oven) my teeth sunk into chewy/sweet bliss. The cookie was uber-soft and matched with the filling resulted with a gooey mess of textures and flavours- which is totally a good thing. The sweet and bitter chocolate combined with the subtle peanut butter flavour from the filling was fantastic!
These are definitely best eaten warm (and because they can't be fresh out of the oven again, I think a microwave will do). I think the Semi Sweet Chocolate substitution added a stronger chocolate flavour that totally worked. I will definitely be making these again.
I was looking forward to sharing some with my classmates at Humber College, but my building "F-building" flooded this morning- awesome? Apparently a pipe burst etc etc Although I know I should be more excited, it doesn't really affect any of my projects/homework being due. Bummer.

When I look back over this past week I realize I've baked a lot. Seriously.
Last Thursday I got together with my friend Allison to bake Peanut Butter-Chocolate Brownies ( I swear this is not a trend, I can, and do, bake with other ingredients besides these two). They turned out great, like every recipe I've ever tried from smittenkitchen. Allison blogged about it here @ her blog peanut butter + crackers, check out her post and some awesome pictures here.

Anyways, tomorrow I am attending Next Generation Day for Toronto Ad week and will be visiting TBWA Toronto, I am beyond stoked.
Till next time,

Addison

Tuesday, January 18, 2011

Banana Chocolate Walnut Bread

After coming home from spending the weekend with my family, I came upon a bunch of "heavily-spotted-ready-to-be-eaten" bananas. The only problem being-I cannot eat 4 bananas in the span of one day (not so appetizing). Realizing that Tuesday is my day off from classes, the abundance of free time that laid before me was calling for some excitement. For something delicious to fill the gap. My mind instantly rang "Banana Bread." My mom used to make Banana Bread every couple of months during my childhood. The sweet and subtle banana flavour paired with the nutty crunch of walnuts is a match made in heaven. I remembered that a previous issue of Cooking Light (October 2010) contained a whole section on Banana Bread's, perfect for the ripening bananas sitting on my bookcase. I didn't want to make just a classic Banana Bread, I was craving something a little more. That's when I came across the recipe for Banana Chocolate Walnut Bread. Perfect.
After receiving my very own Kitchenaid Stand Mixer from my Grandmother over Christmas, I've been looking for any and every excuse to use it. Today was that kind of day. Looking outside to a dreary and cold winter day, I knew that Banana Bread would make everything better. I am in love with comfort food, and that is what Banana Bread is to me. A comforting reminder of my childhood, intermingled between the moist textures and sweet flavours of this dessert/bread.
I began the recipe around lunch time (noon-ish) and as I placed the batter into the loaf pan, and then into the oven, the realization hit me that I wouldn't get to taste this for a whole hour. It was a painstaking hour indeed. The aroma of softly baking banana bread emitting from my oven was intoxicating. I'd lie if I said I didn't sit in front of the oven (every so often) waiting for the timer to hit 0:00.
As the timer buzzed, I rushed upstairs to release my dessert from it's warm and cozy oven. After letting it cool for 15 minutes, I finally cut myself a slice (the end piece first).
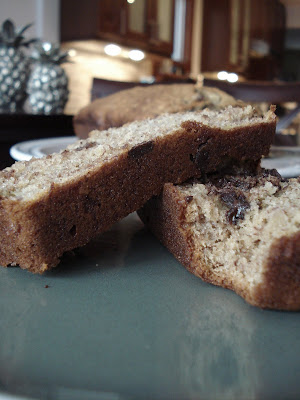
Biting into it was heavenly. The crisp and crunchy golden brown crust gave way to a moist-cakey sweet bread-dotted with chocolate chips. The combination of banana and chocolate is a wonderful one. The hour wait was well worth it, my craving satisfied as I popped the last bit of the end slice into my mouth. Now, what to do with the other 15 or so slices of Banana Bread...

Monday, December 20, 2010

Holiday Baking & Savoring 2010


As the year comes to a close, I can't help but reflect on the many memories and experiences that filled the past 365 days of 2010. An uplifting realization of my passion for baking and cooking stands out powerfully- accompanied by many a cookbook purchased, countless hours of Food Network programming being watched, many a dessert and meal created and shared with the ones I love, and the prevalence of food on my mind. I'm sure it's been said before, but the endless possibilities that baking and cooking presents is exciting, almost magical. This magical aspect of food is heightened for me during the Christmas Season, as festive flavors and smells begin to fill my kitchen. There's nothing I look forward to more than my Mother's holiday baking and my Father's holiday cooking. The combination of the pair is so nostalgic, taking me back to Christmas memories from when I was a little boy. The amount of care and passion my parents put into the food they prepare every Christmas is an inspiration to me, and my culinary explorations. Coming home from college to a fully decorated home, complete with the Christmas Tree whose ornaments tell a thousand stories, always puts a smile on my face.
Even more, the Hazelnut Crescent Moons, Shortbread Drops with Jam, Cranberry, Almond & Pistachio White Chocolate Bark, and Pannetone Bread Pudding add to this smile. With the bar set high by my Mother's baking, I set to work on my own holiday baking endeavors. I embrace this time of year as it is my 1 month of relaxation from the school year (where I don't have to worry about school, about the next idea for an advertisement I have to come up with). More importantly, it's when I can put 100% focus and attention to my family, my friends, and to baking my favourite desserts. I can get lost in Bon Appetit Magazine, watching Diners, Drive In's, and Dives with my girlfriend Jacquelyn, drooling over the envious dishes flaunted on Best Thing I Ever Ate, and over my catalog of Food Blogs from which I draw much inspiration. This is my first blog post, so forgive me if it's a little rusty, or lacking some oomph. Hopefully going to college to be a Copywriter will help with my writing of these posts, wish me luck!
Below are photographs and recipes that I've undertaken over the past week or two. Recipes will absolutely follow.

Here's to many more blog posts dedicated to my passion for baking, and to sharing what I love with the online food-world. May 2011 be filled with delicious, captivating, and memorable meals.

Happy New Year!